Strawberry plants are low-growing perennials with a short, compressed stem, called the crown. The crown produces a whorl of leaves, flowers and fruit, branch crowns, and runners. Many strawberry cultivars spread by producing above-ground stems (stolons), called runners. Runners produce new “daughter” plants that ultimately root. These daughter plants are used for vegetative propagation. Strawberries are composed of a fleshy receptacle (fruit) and many achenes (the “seeds” that you see on the surface of the fruit).
We recommend purchasing certified, disease-free plants from a reputable nursery rather than using daughter plants from an existing planting. Because strawberry cultivars do not need to cross-pollinate to produce fruit, you only need to choose one cultivar.
Site selection
Strawberry plantings are only productive for 3 to 4 years. With careful site selection, you can maximize the quality and quantity of fruit from your plants during that time.
Ideal environmental conditions for strawberries are full sun exposure and fertile, well-drained soils with moderate water-holding capacity. Strawberry plants are sensitive to wet or heavy soils and are susceptible to root rot. Raised beds or mounded rows, if constructed correctly, can create enough height for adequate drainage.
Strawberries can be sensitive to winter cold and frost damage in late winter and early spring, so selecting a site with good air drainage is important. Despite the milder, year-round coastal temperatures, frost can still be an issue.
Soil
It is important to test your soil prior to planting strawberries to ensure it is suitable. Strawberries require a soil pH of 5.6 to 6.5, which is often higher than what naturally occurs along Oregon’s coast. If your soil test indicates that your soil pH is too low (too acidic) for strawberry production, you can amend the soil to improve the pH. A typical soil analysis will also include phosphorus (P), potassium (K), calcium (Ca), magnesium (Mg), and sodium (Na). In addition, it is beneficial to test for boron (B). See Table 1 for recommended nutrient ranges.
Planting systems
Container plantings
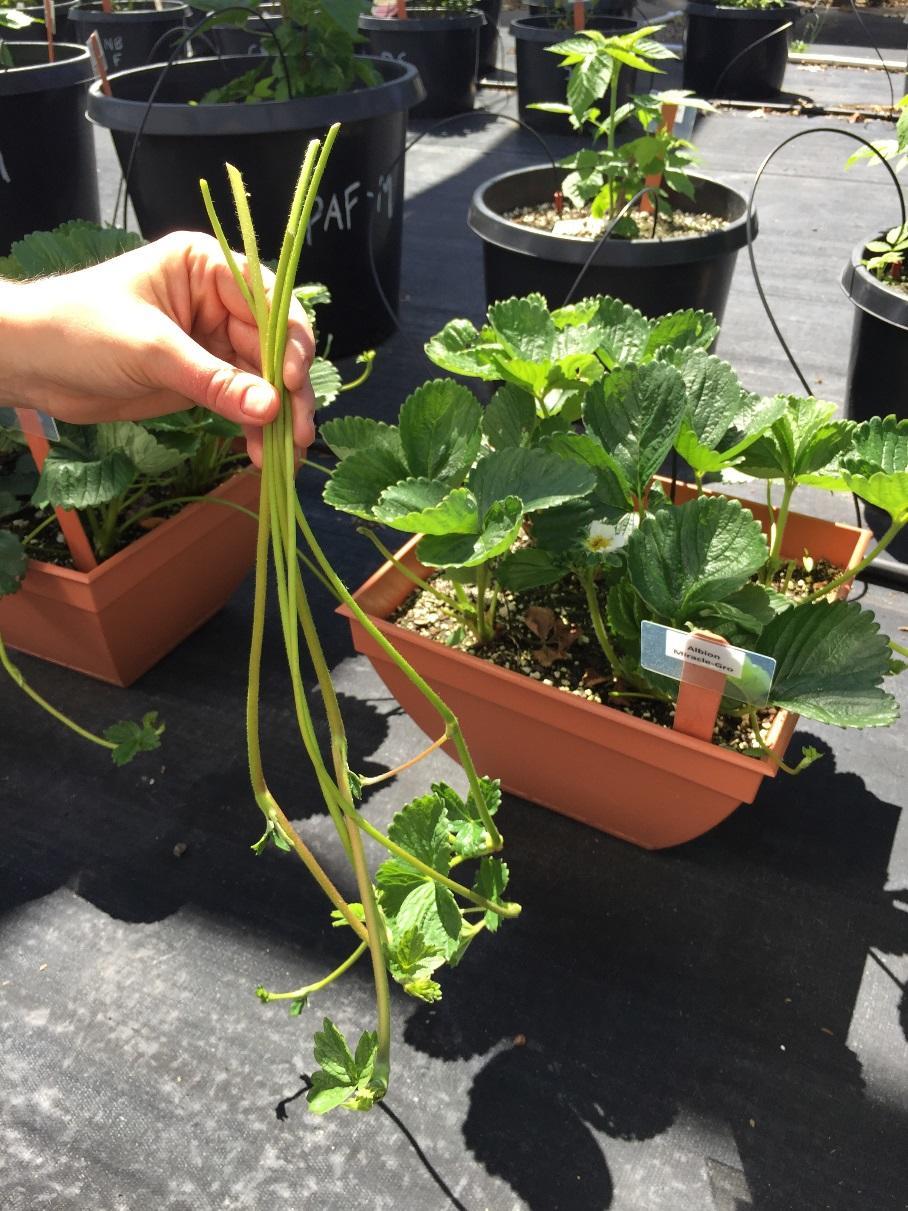
While you can grow all types of strawberries in containers, day-neutral cultivars are the best suited for container growing because they fruit almost continuously from May to autumn frost and don’t produce many runners. Choose containers that are 10 to 18 inches deep and 12 inches or larger in diameter (depending on the number of plants per pot) to allow for sufficient root production. Growing strawberries in hanging baskets is tempting, but any runners that the plant(s) produce need to be removed. These daughter plants would not be able to root when hanging over the edge of the pot and would never become self-sufficient, weakening the potted plant. In fact, runners need to be removed from any potted plant (Figure 4).
When growing strawberries in containers, the larger the container, the more likely the plants can be kept for more than one growing season. You can plant up to four strawberry plants per pot (if about 12 inches in diameter). Generally, “strawberry planters” sold in many nurseries are only suitable for one growing season due to limited space for each plant; purchase new plants each spring for use in these planters.
It is very important that the potting mix and the container drain well. A recommended soil mixture is one part perlite, one part finely ground fir bark, and two parts garden or potting soil; yard centers may sell a similar mix in bulk. If desired, slow-release (sulfur-coated) fertilizer can be mixed into the potting mix at a rate of 8 cups per cubic yard of potting mix.
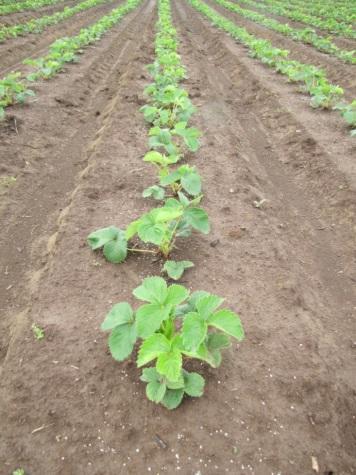
Matted row system
A matted row system (Figures 5 and 6) is the ideal planting system for June-bearers. Build rows or raised beds that are 3 to 4 feet apart from center to center. Set plants about 15 inches apart in the row. Early runners (formed before September 1) should be allowed to grow and root. To ensure that they don’t root in the aisles or off the edge of the raised bed, sweep them into the row or bed area before they root to maintain a row width of 12 to 18 inches. Remove late runners to keep the aisle clear. Flower bud development in June-bearing strawberry plants occurs in late summer for the next year’s crop, so late-rooted runners are not as productive as early rooted ones, as they have less growing time before the flowers initiate.
Hill system
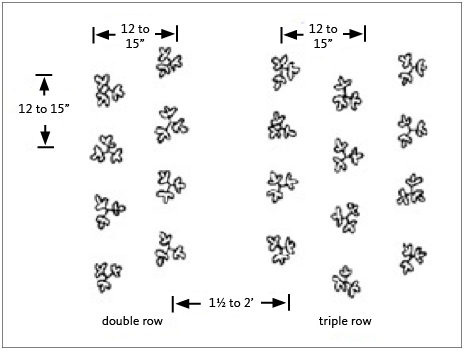
In this system (Figures 7 and 8), plants are maintained as individuals, so cultivars that produce few runners, like day-neutrals, are ideal. However, June-bearers can also be grown in a hill system, provided the runners they produce are removed frequently. Aisles between rows or raised beds should be 1.5 to 2 feet wide. Set plants 12 to 15 inches apart, with two or three lines of plants in each row; stagger the plants. Remove all runners every 2 to 3 weeks. Wait until the runners have formed daughter plants that haven’t rooted yet. If you remove runners before they have formed daughters, it is likely that the plant will increase runner production.
Irrigation
Strawberries, like all berry crops, need adequate water to thrive. You can irrigate your strawberries by hand, or with sprinklers or drip systems. The important thing is to make sure that adequate moisture is getting to the root zone. As in all berry cropping systems, drip irrigation is ideal. Strawberries can be irrigated with a single line of drip irrigation per row with ½ gallon emitters placed every 12 to 18 inches. Place the drip line under any plastic mulch. For more information, see the irrigation section in Growing Berries on the Oregon Coast: An Overview (EM 9177).
Established strawberries typically need from 1 to 1.5 inches of water per week during the growing season. Despite the mild summer climate on the coast, it is unlikely that there will be enough precipitation to provide for crop water needs, so irrigation will be necessary. Wet the soil 0.5 to 1 foot deep with each irrigation. You may need extra water if your soil is sandy or your site is windy.
Mulching
A mulch can help control annual weeds, conserve soil moisture, and, depending on the type of mulch, provide a source of nutrients. Be careful to not bury the strawberry crowns as this can lead to crown rot or plant death. Deep straw should not be used as a mulch because it buries the crowns and can lead to increased vole or rodent activity, which can damage the plants.
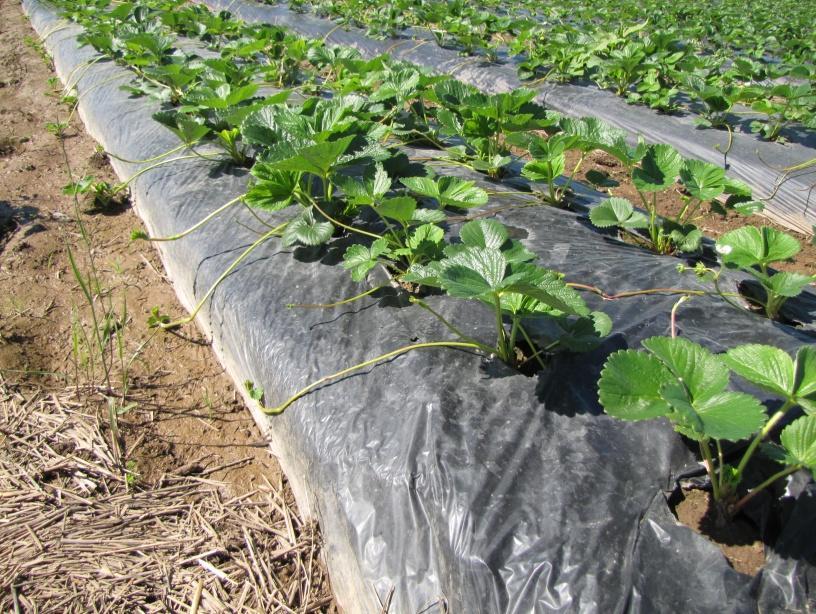
Black plastic is commonly used as a mulch for day-neutral strawberries grown in the hill system. Apply the plastic just before planting, placing it over the row or raised bed, overlapping the edges. Stake down the edges or use soil to hold them down. Cut an “X” or a 6-inch-diameter circle in the plastic where each plant will be set, and plant through the holes. You can also lay down the plastic just after you plant and feel for the plants under it. Carefully cut holes where you feel the plants. When growing on plastic, it’s important to remove any runners that form so the mother plants grow well. It is best to irrigate under the plastic mulch using a drip system. However, you can hand water or use over-head irrigation if there is enough room around plants that is not covered by plastic so that water can penetrate to the roots. For more detailed information on mulches, refer to Growing Berries on the Oregon Coast: An Overview (EM 9177).
Fertilization
New plantings
Fertilize with 2 ounces of nitrogen (N) per 100 feet of row (25 pounds N per acre if broadcasting over the entire field area, as is typical) one or two weeks after planting in early spring. Apply another 2 ounces N per 100 feet of row (25 pounds N per acre) 1 month later (around mid- to late May) and another 0.5 to 1 ounce (12 to 25 pounds N per acre) in late June. See Table 1 for recommended nutrient ranges. In small plantings, broadcast the fertilizer over the soil surface in the row in a band a little wider than the row width; for larger plantings, use a broadcast fertilizer spreader. Apply fertilizer when the plants are dry. Immediately after, remove any remaining fertilizer granules from leaves and crowns by brushing them or using sprinkler irrigation; this reduces the risk of fertilizer burn. Begin fertigating at the same time you would begin applying granular fertilizers (1 to 2 weeks after planting), but divide your total N application into more frequent, smaller doses, such as four biweekly applications or eight weekly applications, ending fertigation in late July. See Growing Strawberries in Your Home Garden (EC 1307) for more information.
Established plantings
Well-balanced fertilizers—such as 16–16–16, a similar type of inorganic fertilizer, and some organic products—work well for strawberries. Established June-bearing strawberries should not be fertilized in the spring, unless your plantings are not thriving. Fertilizing in spring increases leaf growth but does not result in more or larger berries. Dense canopies inhibit air movement and can promote fruit rot. Instead, fertilize at renovation (see “Renovation”) after fruit harvest, which promotes growth and more flower bud development for next year’s crop. Fertilize with 50 pounds N per acre (equivalent to 4 ounces of N for each 100 feet of row). Broadcast the fertilizer in one application, spreading it evenly over the row length and width. Irrigate immediately after fertilizing.
Day-neutral cultivars should be fertilized with a similar amount of N as June-bearing cultivars, but the applications should be divided to ensure plants have enough N during the long fruiting period. To ensure plants have adequate N for fruiting into autumn, apply about 12 pounds N per acre (1 ounce N per 100 feet of row) in early April, May, June, and July, and consider applying an additional 12 pounds N per acre in August, if plant vigor is moderate to good (particularly in sandy soil). In larger plantings, you can fertigate the N along with any other needed nutrients during this same time period. In smaller plantings, brush any granular fertilizer off the strawberry leaves, particularly when using drip irrigation, to avoid any fertilizer burn to leaves.
Harvesting
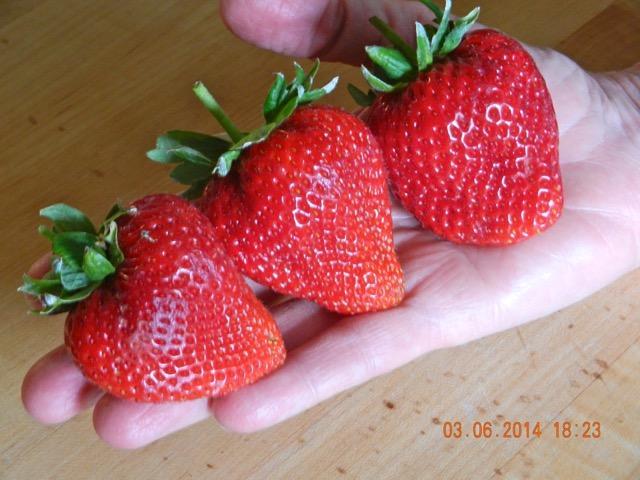
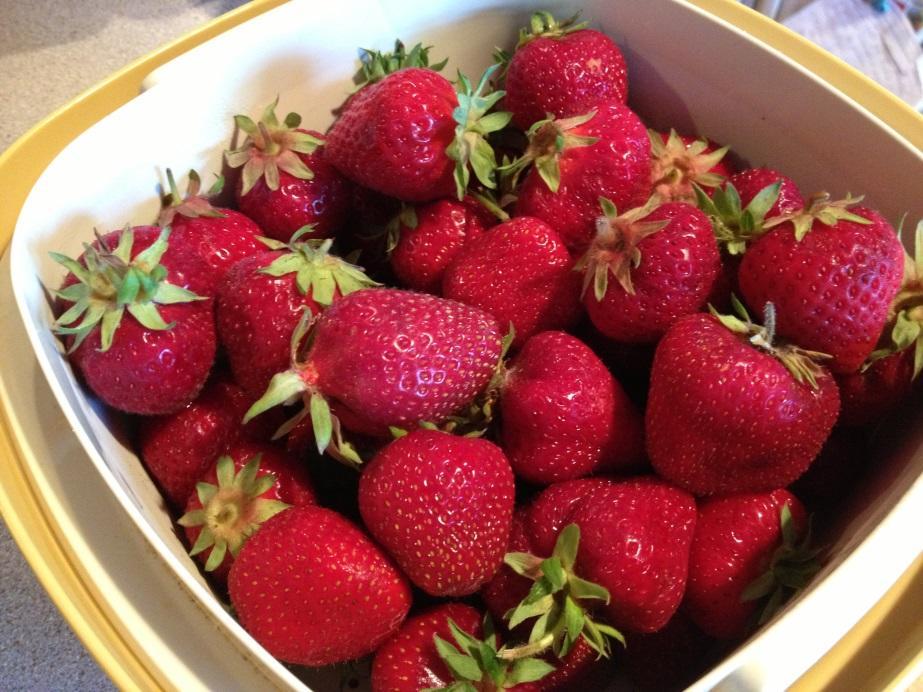
Ripe fruit are fully red. While fruit will store longer if picked at 75 percent red (it will further color after picking), flavor is much improved if fruit are left to ripen on the plant. Air temperature greatly affects how quickly fruit ripens and how often the planting needs to be picked. Check plants more frequently in warmer weather. For extended shelf-life (storage), pick fruit with the cap (calyx) on (Figure 3). However, if you are picking a lot of June-bearing strawberries to make jam or to freeze, then cultivars suited for processing are easily picked without the cap when the berries are fully ripe. Just gently pull the ripe fruit toward you and it will separate from the cap.
Expected strawberry yields are 7 to 15 pounds per 10-foot row (5 to 10 tons per acre), although yield is variable depending on the cultivar and planting age. The highest yields most commonly occur the year after planting.
Renovation
June-bearing strawberries can maintain production for several fruiting seasons (first fruiting season is the year after planting), if they are well maintained. June-bearing plantings are invigorated and produce higher yield if they are renovated after fruit harvest. Renovation is a form of pruning. You should not renovate day-neutral or everbearing strawberries, which are still fruiting in late summer.
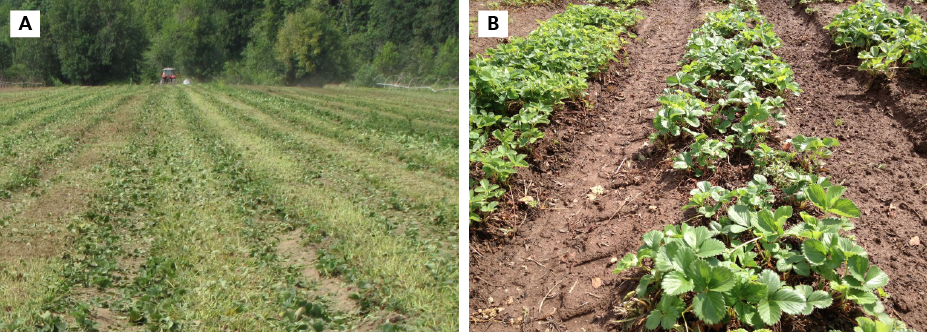
The best time to renovate June-bearing strawberry cultivars is about 1 to 2 weeks after the last fruit harvest (generally in early August). Mow the leaves to about 2 inches above the crown using a lawn or flail mower, or use hand shears in small plantings (Figure 9A). Cut high enough so you do not damage the crowns or basal growing points of the plants. This would greatly reduce yield. In small plantings, rake and remove the plant debris, which can reduce the incidence of fruit rot the following spring. After mowing, narrow the matted rows to about 10 to 12 inches wide by using a tiller or a hand hoe in smaller plantings. After mowing and narrowing the matted rows, fertilize and irrigate to encourage new leaf and runner growth (Figure 9B).
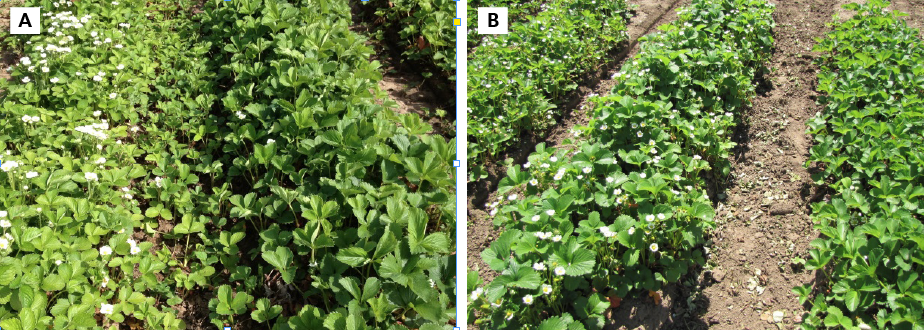
Rake newly formed runners, once daughters have formed, into the matted row area (figure 10A). This encourages the daughters to root in the row rather than in the aisle and will increase yield the following year. Stop doing this by late September as these later-formed runners will not fruit the following year. In spring, you can remove them by cleaning up the aisles using a tiller or hand hoe (Figure 10B).
If you are renovating June-bearers grown in a hill system, mow off the leaves 2 inches above the crown, remove plant debris, fertilize, irrigate, and continue to remove all runners through the fall.
Remove plantings that are not producing well or that lack vigor, generally after three fruiting seasons. During the last fruiting year, start a new planting using newly purchased, disease-free plants, in a new location.
Pests and problems
Weeds and weed management
Weeds compete with strawberry plants for water, nutrients, and light, so it is important to keep weeds out of the row. Strawberries are shallow-rooted, so cultivation must also be very shallow; as a result, hand pulling, especially around the base of the plants, is often necessary. Cultivate no deeper than 1 inch to prevent root damage. The entire area in the strawberry row and under the drip line or canopy of all berry plants must be maintained weed-free during the growing season. Hoe or hand-pull weeds before they become well established to keep the soil loose; this will promote strawberry root and plant growth. A mulch layer of sawdust or bark may help control weeds, particularly annual weeds.
For chemical weed control, check with your county office of the OSU Extension Service or a garden or farm supply store for herbicides registered for use in strawberry plantings. Not all herbicides are registered for all crops.
It is also important to manage weeds between the rows (the aisles) so that they do not spread into the strawberry plant row. The aisles are best cultivated and kept as bare soil, or you can mulch them (e.g., with bark, wood chips, and straw) to discourage weed seed germination.
For detailed information on specific weeds and weed control, refer to the PNW Weed Management Handbook.
Insect pests
The most important insect pest in berry production is the spotted wing drosophila (SWD; Drosophila suzukii). It was introduced to the mainland United States in 2008 and has rapidly become a major problem in all berry crop production areas. This vinegar fly looks like a commonly seen fruit fly; however, the female lays eggs in developing fruit (generally after it first develops some color). The resultant larvae feed inside the berry while the fruit are ripening. Populations of SWD build up during the season, so late-fruiting cultivars (e.g., second harvest of everbearers and later harvests of day-neutrals) are more prone to this pest. For more information on how to control and manage this insect please refer to the SWD publications listed in “For more information.”
Other insects that can be problematic in strawberries include root weevils, aphids, spider mites, crown moths, and symphylans. Slugs may also be a problem.
Check with your local office of the OSU Extension Service for control recommendations if insects become a problem. Control methods are also outlined in the PNW Insect Management Handbook. Keep in mind that control options vary for commercial, small-acreage farmers (with commercial pesticide applicator’s license) and home gardeners.
Diseases
Botrytis fruit rot, anthracnose fruit rot, and various root rots can be a major problem in strawberries, especially in wet and humid environments. The soil-borne fungus, verticillium wilt, can also kill some cultivars.
If disease becomes an issue with your strawberries, check with your local OSU Extension Service office for control recommendations. Control methods are also outlined in the PNW Plant Disease Management Handbook. Keep in mind that options for controlling plant disease vary for commercial small-acreage farmers (with commercial pesticide applicator’s license) and home gardeners.
For more information
To learn more about growing individual berry crops on the Oregon Coast, see these other publications in the series:
- Growing Berries on the Coast: An Overview (9177) https://catalog.extension.oregonstate.edu/em9177
- Growing Berries on the Coast: Blueberries (EM 9179) https://catalog.extension.oregonstate.edu/em9179
- Growing Berries on the Coast: Raspberries and Blackberries (EM 9180) https://catalog.extension.oregonstate.edu/em9180
- Growing Berries on the Coast: Kiwifruit and Table Grapes (EM 9181) https://catalog.extension.oregonstate.edu/em9181
- Growing Berries on the Coast: Gooseberries, Currants, and Other Minor Berry Crops (EM 9182)https://catalog.extension.oregonstate.edu/em9182
Other OSU Extension publications and resources
- Commercial Red Raspberry Production in the Pacific Northwest (PNW 598)
https://catalog.extension.oregonstate.edu/pnw598 - Pacific Northwest (PNW) Insect Management Handbook, Pacific Northwest (PNW) Plant Disease Management Handbook, and Pacific Northwest (PNW) Weed Management Handbook (revised and reissued annually) http://pnwhandbooks.org
- Protecting Garden Fruits from Spotted Wing Drosophila (EM 9026) https://catalog.extension.oregonstate.edu/em9026
- Strawberry Cultivars for Western Oregon and Washington (EC 1618) https://catalog.extension.oregonstate.edu/ec1618
- A Detailed Guide for Testing Fruit for the Presence of Spotted Wing Drosophila (SWD) (EM 9096)
https://catalog.extension.oregonstate.edu/em9096 - Oregon State University Spotted Wing Drosophila information page http://spottedwing.org/
Strawberry cultivars for the coast |
|
|
Day-neutral
|
|
|
June-bearing
|
|
|
Everbearing
|
|
|
Table 1. Recommended soil nutrient ranges for strawberries |
|
|
Soil nutrient |
Deficient at less than (ppm) |
|
Phosphorus (P) (Bray) |
45 |
|
Potassium (K) |
75–175 |
|
Calcium (Ca) |
1000 |
|
Magnesium (Mg) |
120 |
|
Manganese (Mn) |
20–60 |
|
Boron (B) |
1 |
Coastal case study
At a small commercial farm on the coast that follows organic practices, a grower has had success with day-neutral cultivars grown in a hill system by planting new plants each year in late fall. While there is additional expense and effort involved in annually renewing and rotating the strawberry beds, it has paid off. New plants are established by November and typically start bearing quality fruit in early May the following year. Because this cropping system allows more frequent crop rotation, the grower doesn’t have to worry about perennial pest and disease issues.
© 2016 Oregon State University.
Extension work is a cooperative program of Oregon State University, the U.S. Department of Agriculture, and Oregon counties. Oregon State University Extension Service offers educational programs, activities, and materials without discrimination on the basis of race, color, national origin, religion, sex, gender identity (including gender expression), sexual orientation, disability, age, marital status, familial/parental status, income derived from a public assistance program, political beliefs, genetic information, veteran’s status, reprisal or retaliation for prior civil rights activity. (Not all prohibited bases apply to all programs.) Oregon State University Extension Service is an AA/EOE/Veterans/Disabled.
About the authors