9 Steps for Composting Horse Manure

Here’s what to do with that huge mound of stall waste piling up behind the barn
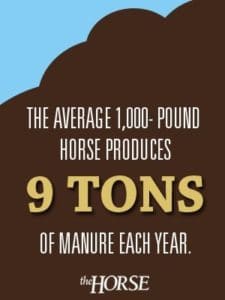
Did you know that one horse produces about 50 pounds of manure per day and more than eight tons per year? Add to that the 8 to 10 gallons of urine a horse generates daily, and a wheelbarrow or more of used bedding, and in no time at all you have a virtual manure mountain on your farm. That mountain can take up a whole lot of space that most horse owners would probably enjoy using for far more appealing things than manure storage (A paddock or training area, perhaps!). Plus, you risk mismanaging with a manure pile: Horses grazing near their own manure can be reinfected by larvae that hatch from worm eggs within. Odors and flies can plague you or your neighbors, and unsightly poop piles can potentially decrease property value. Plus, runoff from soggy manure can cause serious water quality issues for creeks, wetlands, and drinking water.
Composting is a great manure management technique to avoid these problems, particularly for small acreage horse owners. “Composted horse manure is a great source of slow-release soil nutrients for a pasture or garden,” says Caitlin Price Youngquist, PhD, a soil scientist and an area Extension educator for the University of Wyoming, in Worland.
 All organic matter, including manure and bedding, decomposes eventually. “Composting is basically a controlled microbial decomposition of organic material, done under aerobic (with air) conditions. This process is happening all around us in nature,” Youngquist says. “As composters, we are trying to set this process up to produce a more uniform product more quickly than nature would provide. In order to do this, bacteria and fungi require oxygen, water, and nutrients. Our job as a compost manager is to provide the best environment possible for them to do their job.”
As a bonus, as manure and other stall waste break down, the microorganisms generate tremendous amounts of heat that destroy weed seeds, fly larvae, worm eggs, and other disease-causing pathogens.
Ready to consider harnessing these microbes for good on your own property? To begin, Youngquist suggests first figuring out about how much manure you are managing. How many horses do you have? Are you picking up manure daily from stalled horses, or are your horses mostly pastured?
“Once you know how much manure you are dealing with, your two best environmentally sound management practices are to either haul manure off-site or compost it,” states Youngquist. While compost management does require a time commitment, it provides you with a free source of a valuable soil amendment for your pastures, garden, or yard. Compost also saves you money—over the course of a year the manure one horse produces is worth $300 to $500 in compost value.
If composting sounds like the right option for you, then “you want some type of aerated system, either static or turned,” says Youngquist. Both options add air to the compost, keeping it aerobic: A static system forces air into the pile using a blower, whereas a turned pile involves adding air by turning it occasionally, usually with a tractor.
Here is a step-by-step guide to the practical and cost-efficient tractor route:
1. Choose the right location.
Begin by locating an appropriate composting site. Choose an area with year-round easy access that’s convenient for chores. If possible, pick a level, well-drained spot far from waterways or wells so any runoff doesn’t contaminate surface or groundwater.
2. To bin or pile?
This is your choice, but a bin system typically helps keep things neater and easier to manage. “Bins can be made with straw bales, pallets, treated lumber, or ecology blocks (stackable concrete),” says Youngquist. You usually need at least two to three bins or piles. Pile 1 is where you add manure and stall waste daily. Pile 2 is where you monitor temperatures regularly and turn the compost as needed (more on each stage in a minute). Pile 3 is in the finishing or “curing” stage. You can construct multiples of any of these stages or piles. To compost and generate heat, each pile should be at least 3 cubic feet—the approximate size of a washing machine. “In colder climates, piles may need to be larger in order to generate enough heat,” Youngquist adds.
3. Keep it covered!
Covering with a tarp, plastic sheet, or a roof during the rainy season prevents the compost’s valuable nutrients from washing away and causing environmental problems. It also keeps compost from becoming a soggy mess in the winter and crispy-dry in the summer. Tip: If you live in a windy area, weigh down your tarp with recycled milk or detergent jugs filled with gravel. Because you will need to pull the tarp back every time you clean your horse’s stall and paddock, make the tarp setup as chore-efficient as possible. You might even want to attach it to the back of your compost bin or use bungee cords to secure it in place.
4. Get air into the pile.
Oxygen is a crucial component to composting, as again, bacteria and fungi require oxygen to do their work and break down organic matter. The simplest way to provide it is to use a small tractor to turn the pile. If the compost is starved for air, it will become foul-smelling rather than earthy. How often you turn it determines how quickly your compost will be ready to use. Aerated static pile (ASP) systems use a fan instead of mechanically turning the pile. This unit requires little handling for several months until the pile is done—an investment option for larger facilities, as this system can handle a greater volume of material with minimal time investment. Depending of the scale of your operation, ASP equipment and setup costs $500 to $3,000 for a three-bin system.
5. Keep it damp.
Compost should be about as damp as a wrung-out sponge. For dry climates or in the summer, find a chore-efficient way to water your compost, either with a garden hose as you turn the pile or by hosing down the manure and stall waste daily before dumping. Compost should be damp but not dripping. (If you squeeze a handful of material—wear a glove if you like—only a drop or two of moisture should squeeze out from the edge of your hand).
6. Monitor the heat.
The heat the beneficial microbes generate can cause the pile to become fairly warm—about 110-160° F. To kill parasites and pathogens, compost needs to reach at least 130° F for at least three days, says Youngquist. You can monitor temperatures easily using a long-stemmed compost thermometer purchased at a plant nursery or garden store. “An increasing temperature means that the microbes are working for you and doing a good job,” Youngquist says. “When the temperature goes down, that’s the sign that you need to turn and mix the compost. After turning several times, if the temperatures stay low, that indicates you are moving into the curing phase and out of the active composting phase.”
7. Curing compost.
This is when the finished compost sits and “stabilizes.” Worms and small insects move in and break it down further. “When you cure it, cover the compost with a tarp to prevent weed seeds from blowing in and colonizing your compost,” suggests Youngquist. Compost piles can cure for a month up to a year; the longer it cures the more stable it becomes, and the less likely that nutrients will leach out at the first drop of rain.
8. Finished compost.
How actively you monitor your pile’s air and water and how frequently you turn it determines how quickly it will finish. It should take around three months, perhaps longer in the winter when microbial activity slows. You will know your compost is ready when the material looks evenly textured, crumbly, dark-colored like dirt, and is earthy-smelling. Its temperature should be 90° F or less.
9. Put that black gold to good work!
Compost improves plant and soil health and moisture. Use a manure spreader or a shovel to spread it on pastures, lawns, or gardens during the growing season. Spread it in a thin layer, about ¼ to ½ inch at a time, and no more than 3 to 4 inches per season in the same area.
Troubleshooting Compost Pile Problems
| Symptom | Problem | Solution |
| The compost has a bad odor | Not enough air | Turn the pile to add more aeration. |
| The compost has a bad odor and is soggy | Not enough air and too much water | Mix in dry ingredients such as straw or shavings, add aeration, and cover with a tarp. |
| The inside of the pile is dry | Not enough water | Add water when turning the pile. It should be as damp as a wrung-out sponge. |
| The compost is damp and warm in the middle, but nowhere else | Pile is too small | Collect more raw materials, and mix them into the old ingredients. Piles smaller than 3 square feet have trouble holding heat. |
| The pile is damp and smells fine, but is not heating up | Too many shavings, wood chips, or bedding (carbon source) and not enough manure (nitrogen source) | Mix in a nitrotgen source (e.g. straight manure, fresh grass clippings, blood meal, alfalfa, or nitrogen fertilizer) |
Your local Soil Conservation District or Cooperative Extension (nacdnet.org/general-resources/conservation-district-directory) office might be able to provide additional resources on composting space requirements, and bin designs.
Take-Home Message
Finished compost is a precious soil amendment infused with micro- and macronutrients that work in a time-release fashion. It adds “life” to soils in terms of beneficial bacteria and fungi. Studies have shown that compost makes plants healthier and more disease-resistant. Compost also helps your pasture soils hold moisture in the summer—critical if your fields need to survive a hot, long drought.
“Composted horse manure is a great resource for providing nutrients and as a soil builder; it’s highly valued by gardeners and easy to give away.” says Youngquist. “It’s all about how can we change the conversation about manure so that it’s seen as a valuable resource instead of a liability or waste product.”

Written by:
Alayne Blickle
Related Articles
Stay on top of the most recent Horse Health news with


